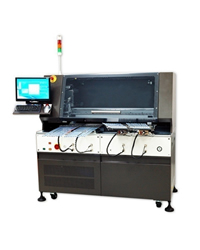
HL-720Automated Tube IC Lead / Mark Inspection System
A Professional Pick & Place Lead Scanner for ICs in Tube
![]()
Introduction
 HL-720 system performs efficient and precised lead inspection, mark inspection and surface inspection with accurate 3D optical measurements for ICs in tube.
Key features
<System function>
System performs mark / surface scanning with Carried CCD on Tube In spots, then pick ICs, go through Fixed CCD for lead scanning and then place ICs on Tube Out spots with passes / failures sorted to individual tube category. Pairs of Tube In and Tube Out move units in and out by turns to eliminate pick & place wait time and easy tube load / unload operation as well.
<Lead inspection>
System provides 3D measurements of lead pitch, lead width, lead co-planarity, lead span, lead skew, terminal dimension, standoff …etc. for SOIC, SSOP, TSSOP… packages.
<Mark / Surface inspection>
Either single marking criteria can be set for all characters or 3 different criteria can be individually set for small, medium and large characters to screen out defects of double marking, low contrast marking, voids or bleeds in the mark, broken or smeared characters...etc.
System also provides surface inspection to screen out body defects such as scratch, crack, chipout…etc.
<3D optical measurement>
The 3DX, accommodated with 3 high resolution digital cameras plus working with powerful I-Cite vision software, provides the algorithms for high speed and accurate 3D image acquiring and processing. Sub-pixel algorithms maximize accuracy of measurements to 1/4 pixel.
<High throughput>
Serialized lead / mark scanning, up to 10 units each pick & place, visual scanning on the fly without having to stop and position as well as extremely high speed image processing contribute system throughput up to ~ 8K UPH for lead and mark inspections.
<Statistical report>
System provides data collection report including yield summary, rejects summary and overall statistical summary with detailed CPK data for Process and QA engineering.
Specification
| Motion | X drive | High performance servo drive system |
| Transmission | Ball screw & linear guide mechanism | |
| Resolution | X axis: ±0.03mm, Z axis: ±0.02mm | |
| Max. stroke | X axis: 1168mm, Z axis: 62mm | |
| Nozzles of Pick & Place mechanism | 10 PCS | |
| Vision | Camera | Fixed 3D cameras 1392 x 1040 pixels for lead inspection Carried 2D camera 1024 x 768 pixels for mark / surface inspection |
| Field of view | Optional 15mm x 15mm / 25mm x 25mm | |
| Image acquiring time | ~ 50 ms / image | |
| Image processing time | 30 ~ 60 ms / image | |
| Optical process speed | ~ 60K UPH (without handler index time) | |
| 3 sigma measurement accuracy | 5 ~ 7 um | |
| Applicable products | Tube form | SOIC, SSOP, TSSOP… etc. IC units packed in tube form |
| Throughput | Lead scan | ~ 10K UPH (assume 100% inspection yield) |
| Lead + Mark scan | ~ 8K UPH (assume 100% inspection yield) | |
| I/O devices | Tube In | Two 10-tube-wide devices mounted. 150mil, 208mil, 300mil packages available |
| Tube Out | Two 12-tube-wide devices mounted. 10 tubes for passes, 2 tubes for lead / mark failures. 150mil, 208mil, 300mil packages available |
|
| Control | Built-in controller | PC based control with Windows XP |
| Display | 17” TFT LCD touch panel | |
| Power | AC voltage | 200 ~ 245V / 50-60Hz |
| Power consumption | 1.0 KVA | |
| Air | Air pressure | 0.6 Mpa (~6.0 kg/cm2) |
| Air consumption | 50 liter/min | |
| Dimension | Base Unit | (W)1550mm x(D) 750mm x (H)1600mm |
| with tube I/O installed | (W) 1550mm x (D) 1290mm x (H) 1480mm |
Inquiry
<Business Hour> Week day10:00-17:00
Please feel free to contact us from the following form for more detail.


